Sunday, November 30, 2008

Famous Hummus

Last night we went out to dinner with our friends Jeff and Donna. We went to the Jerusalem Restaurant that serves the most delicious fried tomatoes and eggplant with lemon and garlic...ever. The taste cannot be duplicated at home and believe me, I have tried. I could eat just that for dinner...
But we did have an assortment of appetizers and kebabs to round out the dinner. Everything was very good.
Jeff claims that his family says his hummus is "the best" and it is as good (or better than) the one we ate at the restaurant. He promptly rattled off the ingredients for the recipe and I quickly wrote it all down. I tried it out at home and it is, indeed, very good. Heat up the pita bread before serving and add some olives before serving.
Jeff's Famous Hummus
1 can chickpeas (19 oz.), drained and rinsed, with 1/2 cup liquid reserved
1/2 - 1 teaspoon salt
1/4 teaspoon pepper
1/2 teaspoon cumin
2-3 tablespoons olive oil
2 cloves garlic
2 tablespoons lemon juice
1/4 cup tahini (sesame seed paste)
* Put everything in a blender or food processor and whizz it together. To serve, top the hummus with a drizzle of olive oil and a few drops of hot sauce.

Sunday, November 2, 2008

Bouillabaisse


On Saturday, my friend Sheri and I went to the St. Lawrence Market to pick up the ingredients for bouillabaise (fish stew). Lucky for me Sheri is always up for a food stop to fuel up before the shopping so we stopped at Richtree's for rosti, sausage and coffee before we went to the market.
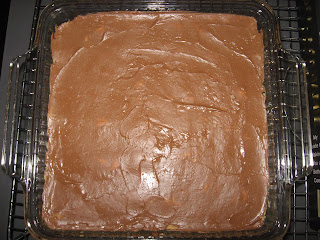
The soup is really a mixed fish stew served over a piece of crispy bread layered with Swiss cheese and served with a dollop of spicy "rouille" on top. This is truly a "special occasion" recipe as the cost of the ingredients do add up and there are a lot of parts to the recipe. However, the results are truly remarkable and even as I write this I am remembering how delicious it was!
I found this recipe in a Time-Life book on the Cooking of Provincial France. I picked this up at a second-hand bookstore many years ago as it is written by one of my favourite authors, M. F. K. Fisher (if you like to read books about food, read anything written by her, she is a wonderful writer). It was a lucky find. The way that Sheri and I prepared this, it was heavily adapted from the recipe, which makes it less authentic to the French original (i.e. no eels) but a little bit easier to do and just as delicious.
Sheri and I cooked up the soup and, keeping with the French theme, we also prepared creme caramel for dessert. Jeff and Jon showed up to enjoy the food (and of course to tell us how good it was!).
Bouillabaisse (based on recipes from The Cooking of Provincial France - 1968)

Soup Base (court bouillon)

2 onions, thinly sliced
2 leeks, thinly sliced, white and pale green parts only
2/3 cup olive oil
4 cups fish stock + 2 cups white wine + 2 cups water (or a mix to make 8 cups)
1 ml can chopped tomatoes
1/2 teaspoon fennel seeds, crushed
2 cloves garlic, finely chopped
2 pieces of orange peel, about 7 cm long and 2 cm wide
1 teaspoon dried thyme
2 bay leaves
1/4 teaspoon saffron threads
salt and pepper to taste
* In a large stock pot, saute the onions and leeks in the oil until tender. Add remaining ingredients and cook uncovered for 30 minutes.
Fish and Seafood
2 tilapia fillets
1/2 pound bay scallops
1 pound mussels
1 pound small shrimp
* Cut up the fillets into small chunks. Peel and devein the shrimp. Rinse and clean the mussels. Drop the fish, scallops and mussels into the simmering stew. Cook for about 5 minutes. Add the shrimp and cook an additional 5 minutes.

Croutes
Slices of baguette, toasted (one large or two smalls per person)
1/2 cup freshly grated parmesean mixed with 1/2 cup grated Emmenthal (mild Swiss) cheese

Rouille (hot pepper sauce)
2 large roasted sweet red peppers
2 cloves garlic
3 tablespoons olive oil
3 drops Tabasco
1/2 cup water
* Whiz everything together in a blender. Done.
To Serve

In a bowl, place the toasted bread and layer with the cheese mixture. Ladle the fish stew over the bread and cheese. Pass around the rouille to drizzle on top.

Sunday, October 26, 2008

A Favourite Cookbook

Today I decided to make an old favourite of mine...refrigerator sugar cookies. They are the perfect treat with a cup of tea, thin and crispy, but not too sweet. The recipe comes from my mom's old Joy of Cooking cookbook. It is well-loved as the spine is split in three places and is currently held together with a red elastic band. You can see from the photo that my dad gave it to my mom, complete with an affectionate message, on Christmas 34 years ago. The "Joan and Bruce Show", as I like to call their marriage, has been going strong for over 53 years!

This book was originally published in 1931 and is an excellent resource when you need a classic recipe. I have used it to learn many classics, from creme caramel (flan) to waffles.
These cookies go together quickly and can be frozen in the "log" state and baked later. I usually decrease the amount of sugar, double the recipe, bake one "log" and freeze the other one for later use.


Butterscotch Refrigerator Cookies
(adapted from the Joy of Cooking - revised 1973)

1 cup butter, softened
1 3/4 cups brown sugar
2 eggs
1 teaspoon vanilla
2 1/2 to 3 cups of flour
1/2 teaspoon salt
3 teaspoons baking powder

*Cream together the butter and sugar. Add the eggs and vanilla, then mix in the salt, baking powder and flour. Start with 2 1/2 cups of flour and if the dough is still sticky add the extra flour.
Tear off a generous piece of plastic wrap and put half of the finished dough in the middle. Gently shape the dough into a log shape with a diameter of about 5 cm. Wrap and chill in the freezer for about 30 minutes, so that it is easier to cut. (You may leave the dough in the freezer at this point.) Cut the dough into thin slices and bake at 400F for 8-10 minutes (watch them as they can burn easily).

Birthday Cupcakes

For my son Max's birthday this year, I decided to make brownie cupcakes instead of the usual birthday cake. I used a recipe I found a few years ago in Woman's Day magazine. After the first attempt 5 years ago, I wrote on the recipe, "very good. Dean gave me a hug they were so good!"
I like this recipe because it uses semi-sweet chocolate. Many brownie recipes use unsweetened baking chocolate. So you can always use semi-sweet chocolate chips if you don't have baking chocolate squares on hand. As you can see in the photo, we indulged in chocolate whipped cream on top...it was a special occasion after all.
Brownie Cupcakes (from Woman's Day, September 1, 2003)
1/2 cup butter
4 squares semi-sweet baking chocolate
3/4 cup sugar (the original recipe calls for 1 cup)
2 teaspoons vanilla
3 eggs
2/3 cup flour
2 tablespoons cocoa powder
1/2 teaspoon baking powder
* In a saucepan on medium heat, melt the butter and chocolate. Remove from the heat and stir in the sugar, vanilla and eggs. Add the flour, cocoa powder and baking powder and stir until just blended. Divide batter among 12 muffin cups lined with muffin papers. Bake at 325F for 25-30 minutes.

Monday, October 13, 2008

Thanksgiving 2008


Thanksgiving is a great excuse to bake more than one pie. After all we are celebrating the harvest and being grateful for our families and food...
This year we went to my parents' house for dinner. My mother, as usual, did a fantastic job and brought together all the favourites - roast turkey, gravy, cranberry sauce, stuffing (our tradition is to use bagels in the stuffing so it doesn't get soggy), mashed potatoes, green and yellow beans, and mashed turnip (a nod to my mother's Nova Scotian heritage). A truly Herculean effort on her part. Only when I started to be responsible for the large family dinners did I realize just how much work it was. Mom always made it seem so easy. I provided the pumpkin and apple pies for dessert. Oh yes and there was some whipped cream too (do calories count on Thanksgiving?)
When I was young teenager, we lived in a house around Bayview and York Mills in North Toronto. We had the distinction of having a working wood stove fitted into our basement. My Dad installed it in the seventies as a reaction to the "energy crisis" of that time. He attached it to our heating duct system so it provided not only heat but also a place to cook. During that time I recall on Sundays (and of course Thanksgiving) my mom cooking roasts and baking in the oven. She was able to teach me how to use the wood stove to cook and bake since she grew up with a wood stove in her house in rural Nova Scotia. I helped when I could since most of my weekend time in those days was spent doing homework and studying. Then, as now, I loved to bake and it's interesting for me to reflect on my honing my baking skills in those days with my mom's help and the wood stove in the city.
My dad (who loves jokes that manipulate language) enjoyed my comment that my making two homemade pies today, I was like a pioneer ("pie"-oneer).
My mom generously gave me the remains of the turkey to make soup. That is my project for today - homemade turkey, vegetable and rice soup. Some people throw the bones etc. away but I was taught to use up their goodness by making delicious soup - I guess I do have a bit of pioneer inside me.

Thursday, October 9, 2008

Homemade Bread and Butter


Today was one of my favourite teaching days. The time when we celebrate Thanksgiving together is a wonderful time to talk about what we are thankful for, to create bread, butter and vegetable soup from scratch and to share our good fortune with teachers and staff.

The students always love the taste of this homemade bread. Of course it tastes even better with homemade butter.

I have managed to find a way to bake bread without an oven. This is a necessity in a classroom where you do not have easy access to a stove. One year when I baked bread in a school, I set off the fire alarm and the whole school was evacuated! You see I didn't realize at that time that the ovens in staff rooms may not have been cleaned regularly...

This is a Welsh bread recipe that is designed to be baked in a frying pan on an open fire. I use an electric frying pan in school and a regular frying pan on an electric stove when baking this at home. I have adapted the recipe to use the "quick-rise" style of yeast, which reduces the usual two rising times to just one and replaced lard with vegetable oil.

Welsh "Planc" Bread (from The Book of Bread by Judith and Evan Jones - 1982)

3/4 cup recently boiled water
3/4 cup milk (not skim)
1 tablespoon vegetable oil
2 packages "quick-rise" style yeast
2 teaspoons salt
3 1/2 to 4 cups all purpose flour

* In a large bowl put the water, milk, oil and salt and mix together. Add one cup of flour and stir. Add both packages of yeast and mix in. Stir in 2 1/2 cups of flour - at this point you will have to start mixing with your hands. Keep adding in flour and kneading with your hands until the dough pulls together into a ball and is dry to the touch - about 5-8 minutes. Put a clean tea towel over the top of the bowl and let rise, in a warm place, for 45 minutes to 1 hour. Punch down the dough and put on a lightly greased frying pan (no heat) and let rise for about 20 minutes. Put the heat on med-low and make a "tent" of foil. Leave the bread to bake for 15-20 minutes and check the bottom of the bread. If there is a nice brown crust, turn it over, replace the foil "tent" and bake an additional 20 minutes. Remove the bread to a cooling rack. Cut into slices and serve with butter. This bread also makes excellent toast.

Homemade Butter in a Jar

500 ml whipping cream (regular is good but organic is really good)
1 tsp salt
1 glass jar (I use a clean empty jar of "Classico" spaghetti sauce)

*Pour the salt and cream into the jar. Shake the jar vigorously for 15-20 minutes. The cream will get thicker and thicker and all of a sudden - KERPLONK- the butterfat separates from the whey and you have a large lump of butter in the jar. Pour off the whey and spoon out the butter into a dish. You may have to "squeeze" the fresh butter with the back of a spoon to release the remaining liquid.

Tuesday, October 7, 2008

Broccoli and Cheese Soup


One of my favourite cookbook authors is Nigella Lawson. Her recent book is a collection of recipes that are very fast and inexpensive to create. I also manage to get a good result even though I don't always have the exact ingredients on hand.

I tried this soup recipe last weekend when my parents came over for dinner and lo and behold both my children actually ate it...and one even said (without prompting) "this is good". Now, there was a liberal scattering of grated mozzerella and cheddar cheese (children) or Stilton cheese (adults) to enhance the taste.

I used my food processor to grate a block of mozzerella cheese and a block of "old" cheddar cheese. Then I used it to blend the soup.

Broccoli and Cheese Soup (inspired by Broccoli and Stilton Soup from Nigella Express - 2007)

2 tablespoons olive oil

1 onion, finely chopped

I clove garlic, chopped

1 tsp dried thyme

1 kg bag frozen broccoli

4 cups vegetable stock (I used a stock cube)

salt and pepper to taste

250 g cheese (Stilton - crumbled; Mozz/Cheddar - grated)

* In a large pot saute the garlic and onion in the oil. Cook about 5-7 minutes. Add the frozen broccoli and vegetable stock, cover and cook for 10 minutes or until the broccoli is tender. Use an immersion blender or a food processor to blend the soup. Return to the pot, season to taste with salt and pepper and reheat slightly. Serve soup with a generous sprinkle of cheese on top.

Monday, September 29, 2008

coleslaw for a party

The joke in my house growing up was that the best coleslaw was made by Colonel Saunders. We had a pool in our backyard and every so often as a treat my parents would buy a bucket of Kentucky Fried Chicken and a tub of coleslaw to eat on the patio beside the pool. KFC's coleslaw with it's sweet, creamy texture and alarming flourescent green colour was the perfect foil to the fried chicken.


This weekend we went to my brother-in-law's to celebrate the September birthdays of my niece Chiara and nephew Jake. In honour of Chiara's 18th birthday I managed to make her a book that contained 18 pieces of homemade jewellery. It took all day Saturday, but I managed to make 8 necklaces, 2 bracelets, 7 pairs of earrings and one cellphone charm.

For the party, my sister-in-law Ant asked me to make my 'famous' coleslaw. She is a vegetarian and this coleslaw is one of her favourite dishes. If you have a food processor, this salad goes together very quickly and leftovers keep well in the fridge. If you want to get fancy, save a leaf from the carrots to garnish the bowl.

Nancy's Easy Coleslaw

1 small cabbage, outer leaves and core removed (I used a nappa cabbage)
3 large carrots, peeled
2 apples , leave the skin on (I used MacIntosh apples)
For the dressing:
1 X 175g container plain (unflavoured) yogurt
3 tablespoons apple cider vinegar
2 teaspoons sugar
3 tablespoons dijon mustard
1/2 cup mayonaise

* In a food processor, with the grater blade, shred the cabbage, carrots and apples (you may need to do it in two batches). Tip the grated vegetables into a large bowl. In a small bowl dissolve the sugar in the vinegar. In a one-cup glass measuring cup mix together the yogurt, vinegar-sugar mixture, mustard and mayo. Pour over the vegetables and mix well. If the coleslaw seems a bit dry add more mayo, a tablespoon at a time.

Sunday, September 14, 2008

baked peppers and tomatoes


...this photo was from before they were baked...I forgot to take a picture afterward!

This is one of my favourite recipes to make in the fall when Ontario tomatoes are at their best and red peppers aren't so expensive.

I stumbled on this dish over 15 years ago. At that time, TVO aired many different British cooking shows and would offer the companion book on mail-order at the end of the show (another favourite at that time was an Indian cooking show by Madhur Jaffrey). This comes from the doyenne of British cookery, Delia Smith, on her Christmas special. Her recipe includes fennel inside the baked peppers but since I am alone in my home in my affection for the flavour of licorice, I have adapted it without (although it would probably be delicious).

Roasted Red Peppers (adapted from Delia Smith's Christmas - 1990)

4 large red/yellow peppers, cut in half, seeds removed

1 carton of fresh "heirloom" cherry tomatoes, quartered

3 cloves garlic, sliced very thinly

8 tablespoons olive oil

juice of 1/2 lemon

salt and pepper

* In a 9X13 pan, arrange the peppers, cut-side up. Distribute the tomatoes and tuck in the slices of garlic (so they don't burn). Drizzle one tablespoon of oil into each pepper. Add a generous grinding of pepper and salt on top. Bake at 350F for about one hour. After taking the pan out of the oven, squeeze the lemon juice over top. Serve with good sourdough bread, rice or egg noodles.

blueberry pancakes


Back in August, Lucy Waverman's article in the Globe and Mail had this recipe. They don't look so beautiful but they tasted really good. Even my boys, who prefer the wafer-thiness of crepes, liked these thin crepe-like pancakes (or as they were dubbed at our house "crancakes").

Blueberries have had an uneven history with me. One of my favourite food memories are eating "blueberry toasties" for breakfast at Howard Johnson restaurants. These were square sweet cornbread-style pastries that had an amazing ability to soak up butter. On the other hand, I once was stung by a wasp picking blueberries when I was working north of Sault Ste. Marie for the Ministry of Natural Resources. My arm swelled up like a balloon. I guess that's what I got for taking time off work to fill my hardhat with wild blueberries!

Dave Seidler's Best Pancakes Ever (from Lucy Waverman's Globe Article on August 23, 2008)

1 cup flour

3 tablespoons sugar

2 teaspoons baking powder

1/2 teaspoon baking soda

1 cup buttermilk (I didn't have any so I soured 1 cup regular milk with 1 tsp. of lemon juice)

1/2 cup water

1 egg

1/3 cup vegetable oil (I used sunflower oil)

1 cup washed blueberries

* Do not overmix, as it makes the pancakes tough. This recipe made about 10 large pancakes. Serve with maple syrup.

Tuesday, August 26, 2008

late summer treats


Yesterday my parents came over for dinner. My Dad painted our front door and frame for us while I was busy in the kitchen. The door had been primed and ready to be painted for over a year and I'm embarassed to say I never got around to finishing it. My Dad used to own a painting and contracting company and I think it really bugged him that it wasn't done, so he decided to do the job. It looks great and it's nice that (once again) my wonderful dad helped us out.

For dinner we had fresh corn served with my new favourite accompaniment salsa verde. I got this recipe from a book I've had for several years that I picked up at the Moosewood Restaurant in Ithaca, New York. If you try any recipe from this blog, try this one, it is really delicious! (My Mom even ate it and she is known for her dislike of fresh cilantro - I wonder if I converted her...)


I love pie! I love to bake pie. I love to eat pie. I love to read about baking and eating pie. When I was young my Mom would bake peach pie in late summer. Her version is an open, one crust pie with artfully arranged peach slices and a clear glaze with a hint of almond essence. I wanted to make a different kind for her to try. In a book devoted to the art of pie-making, that I will confess was an impluse buy, I found the delicious recipe for the filling. The pastry recipe I wrote down from a TV show and I can't remember the title of the show! It turned out so well, I baked one this morning for my friend Darryl (as a thank you for a favour he did for me).


Salsa Verde (from Moosewood Restaurant Cooks At Home - (1994)


1/2 cup olive oil


1 cup fresh parsley leaves (this is really good but yesterday I used cilantro instead)


3 garlic cloves


1/3 cup fresh lemon juice (I used a mix of lemon and lime juice)


2 tablespoons capers, rinsed


1/4 cup chooped scallions (I omitted these because I didn't have any)


1/4 tsp salt and pepper


Whiz together in a food processor or blender. I course, I use my "Magic Bullet" blender (how I got that is a whole other story!)


Pie Pastry (from an unremembered TV show)


1 cup plus 2 tablespoons flour


1 tablespoon sugar


1/2 tsp salt


1/2 cup unsalted butter (cold and cut into small cubes)


3 tablespoons very cold water


1/2 tsp vanilla


*Mix together the flour, sugar and salt. Add the butter and mix together with your fingertips until no large lumps remain. Sprinkle the water and vanilla over top and mix together until it forms a dough (you may need to add a bit of water). Roll into a ball , wrap in plastic wrap and put in the fridge for about 15 min. Take out the dough and cut off about 1/3 to save for the top. Roll out the remaining on a floured surface and line a pie plate and crimp the overhang onto the edge. Put in fridge while preparing the filling.


Brown Sugar Peach Pie (from Sweety Pies - An Uncommon Collection of Womanish Observations with Pie (2007) by Patty Pinner)


Filling


3/4 cup brown sugar


3 tablespoons flour


3 tablespoons corn syrup


2 tablespoons butter (I used unsalted butter)


1/2 teaspoon ground cinnamon


1/2 teaspoon ground nutmeg (I used fresh grated nutmeg)


1/8 teaspoon cloves (I omitted this because I didn't have any)


About 5 cups of sliced peaches (I used about 7 and I blanced them first to make them easier to peel - and good ol' Mom helped me to peel them)


*Put all ingredients (except the peaches) in a saucepan and heat together until the sugar is dissolved.


Arrange the peach slices over the crust and pour the sugar mixture evenly over top. Roll out the top crust and cut into strips and arrange over the top.


Bake the pie at 400F for about 25 minutes, but check to make sure the crust does not burn.


Friday, August 22, 2008

banana bread break


This morning my friend Gillian came over for coffee. She is a expert on books for children so we always have something to new to discuss. It also helps that she loves to cook and appreciates home baking. So I decided to try Sheri's recipe for banana muffins. I recently asked Sheri for her recipe because I was having trouble making muffins that were moist but with not too much fat. It went together quickly and in no time we had a lovely treat to enjoy with our coffee.

The result...delicious...even though I had to make a few substitutions because I was missing some ingredients and...there was a point where I needed to use pliers to yank out the plastic top of the oil bottle that had broken!

Dean (who is currently beside me, munching on a piece as I type this) says, "This is good. I guess this would be good for dipping in tea/coffee."

Sheri's Banana Muffins (Bread)

1 cup mashed bananas (2 or 3)

1 cup sugar (I used 2/3 cup)

1/4 cup vegetable oil ( I use sunflower oil)

1/2 cup sour cream (Sheri says "lite" is okay and I used 5%)

2 eggs

1 cup flour

1/2 cup whole wheat flour (I used graham flour)

1 tsp baking powder ( I used 2 tsp since I didn't have any baking soda)

1 tsp baking soda

1/2 tsp salt

Pour into two greased loaf pans. Bake at 325F for 40 minutes (you would need to shorten the baking time if you were making muffins). Sheri also suggested that nuts/chocolate chips would be good additions.

Friday, July 25, 2008

apple cobbler y'all


Okay, so I'll admit to catching the occasional episode of Martha Stewart while on summer holiday. This week I saw one of Martha's food editors demonstrate a southern-style fruit cobbler that I just loved because it was a really simple batter to make and was different from the sweet-biscuit-dough-on-top type that I've made before.
The editor's name is Virginia Willis and she was on the programme to promote her new book, Bon Appetit, Y'all. I managed to find the recipe on www.marthastewart.com under "Blackberry Cobbler".
Since I didn't have any blackberries but I did have some apples that needed to be eaten up, I decided to make apple cobbler. I also used a 9" X13" pan - the original recipe used a cast-iron skillet. In my haste for the recipe I wrote it down quickly on a scrap piece of paper and there wasn't an egg in the batter. So I added an egg thinking I simply forgot to write it down (although I checked the website and there isn't an egg in the original recipe - note to self - keep that recipe for when there are no eggs in the fridge!).
Everyone in the family said this was really good (despite the absence of chocolate) and I would definitely make it again. Next time, maybe raspberries or peaches or raspberries and peaches...
Nancy's Fruit Cobbler
1 cup flour
1 cup sugar
pinch salt
2 tsp. baking powder
1 cup 2% milk
1 egg
1 tsp. vanilla
1/2 cup melted butter
*Preheat oven to 350F. Grease a 9"X13" pan. Mix together the flour, sugar, salt and baking powder. Mix together the milk, egg and vanilla. Pour the liquid mix into the dry ingredients and stir until just blended. Add in the melted butter and pour into the prepared pan. Sprinkle the fruit over the top. Bake for 40 minutes.

cute cookie translation


I had a nice surprise this week when Sheri gave me a lovely care package of new (to me), different food items that she bought at the new Superstore by Scarborough Town Centre. In the mix was a package of cookies made from white chocolate and green tea. Often on these imported items, it is interesting to read the English translation of the product description...
Each cookie is very pretty and looks like a fancy iced cake with white chocolate spread on the top and bottom and pale green on the sides. The taste is subtle with a faint hint of jasmine tea.


Wednesday, July 23, 2008

coffee themed trading cards


Today I sent off 7 of these cards to Arizona as part of an ATC (artist trading card) swap. The theme was "a cuppa joe" and the cards in the swap will be displayed in a local cafe. As part of the swap I will receive 6 cards back from various places in the U.S. The cards are 6 X 9 cm.

I painted the card with three layers of paint. Next I collaged on a picture a crazed squirrel that I found in a British magazine ad for kid's clothes. For the pattern stamp and the coffee mug stamp, I carved erasers from the dollar store. Finally, I sewed the 'thought bubble' on the final card.

fresh corn and the last cherries of the season


Cherries and corn fresh from the market at City Hall today.

Tuesday, July 22, 2008

marble cake and sugar stars


Yesterday was my mom's birthday and the whole family went to "The Keg" for dinner. The steak is really very good there (and I'm not much of a red meat eater so that is saying something).

We came back to our house for tea and dessert. I baked this marble cake (of course the mix of the plain and chocolate cake makes everyone happy). For the occasion, I broke out out the piping bag, but in order to use up the icing, a lot of sugar stars ended up on that cake!

The cake is very easy and quite moist and delicious. I based the recipe on one from BBC Good Food magazine. Some of the measurements are by weight, but investing in a food scale is a good idea. I resisted this purchase for many years (it seemed too complicated) but for some reason I gravitate toward British food authors and those recipes use weight measurements. I finally gave in about a year ago and bought one for $8 at Kitchen Stuff Plus.

I baked this in a bundt pan instead of the 8" cake pan stated in the recipe, and decreased the baking time. I have also baked it in two small loaf pans (one to eat and one to freeze). I used my fab-u-lous Kitchen Aid (thanks again Mom and Dad) to mix it up.

Marble Cake (inspired by a recipe in BBC Good Food March 2008)

225 g butter, softened (this time I cut the butter into cubes and left it for 30 minutes)

225g white sugar

4 eggs

1 tsp vanilla

225g flour

1 tsp baking powder

3 tablespoons milk

3 tablespoons cocoa powder

*Preheat oven to 350F. Butter a bundt pan. Cream together butter and sugar. Add eggs and vanilla. Add half the flour then the milk followed by the rest of the flour. Drop the batter by spoonfuls into the prepared pan until half the batter is tranferred. To the rest of the batter mix in the cocoa powder and then drop the chocolate batter into the pan. Use a knife held vertically to pass through the batter in the pan to creat the "marble" effect. Bake for about 30 minutes.

Friday, July 18, 2008

chocolate swirl chip cookies

In my never-ending quest for different homemade chocolate treats for my family, today I devised this new version of chocolate chip cookies.

I cannot remember the source of the original recipe because I have made versions of these for so many years the basic recipe is engrained in my brain!

My younger son likes the milk and white chocolate swirl chips that are sold in Loblaws and I used these in these cookies. When he tasted them he said, "These are really good!" - that is not just plain good, but really good. Ah... music to a baking mom's ears.

I use a melon-ball-ice-cream-style-device to scoop out the batter. My mom gave it to me years ago and honestly I don't know what else to call it. I also use a Silpat reuseable baking mat to line the cookie sheet. This is also thanks to my mom. Wow more reasons to love her!

Nancy's Chocolate Swirl Chip Cookies (makes about 48 cookies)

1 cup butter (remember I'm not very organized so I always soften butter in the microwave first)
1 1/4 cups brown sugar
1 tsp vanilla (use real vanilla, it really does make a difference)
2 eggs
1 tsp baking powder
3 heaping tablespoons cocoa powder
2 1/4 cups flour
1 package (226 g) "The Decadent Swirled Milk & White Chocolate Chips"

* Preheat oven to 350F. I use my KitchenAid for mixing this batter. Cream the butter and sugar together until well blended. Add the vanilla and eggs. Add the rest of the ingredients (except the chips) and mix until just combined. Take the bowl off the machine and fold in the chips. Drop on a cookie sheet, a dozen at a time and bake about 10 minutes.

peas and raspberries


At the house I grew up in we had wild raspberries in our backyard. We never got more than a handful at a time but boy were they good. My friend Chris brought me these raspberries the other day. She and her daughters had gone berry picking the day before. I think they look beautiful just the way they are...and they taste as delicious as they look...

At the same house, we had a small vegetable garden in our backyard right beside our pool. The pool was really a wonderful "cement pond" (like in the Beverly Hillbillies and pronounced "see-meant pawnd"). The pool had to be painted blue and white every year and when I was older, I would help my dad with the cleaning and painting. We also had a tradition of painting a different cool graphic on the bottom of the shallow end each year. We had a happy face, the symbol for "International Women's Year", and the word 'diver' shaped like a diver among other creative ideas. One time my dad made a stencil from the outlines of my feet and we made a footprint path all over the bottom of the pool. My dad really had some cool ideas.

These peas-in-the-pod reminded me of my old house. I remember swimming and coming out of the pool near the garden so that I could eat fresh peas straight off the vine. I bought these peas to show my kids and tell them this story. We also compared eating fresh, fresh cooked and frozen peas.

Thursday, July 17, 2008

potato salad days


Today, my friend Chris came by for lunch. We are both teachers and it was our semi-annual swap of books and other classroom stuff.

I made this potato salad using a Jamie Oliver recipe as a starting point. I used fingerling potatoes and green beans that I bought at the farmers market yesterday and I had some fresh plum tomatoes and scallions on hand. It's a nice change from the classic mayo-based potato salad.


Chris and I enjoyed this salad with pumpkin cranberry bread, brie and havarti with dill. It was really very good and I would definitely make it or a variation of it, again.

Nancy's Potato Salad

(based on Potato Salad with Smoked Salmon from Jamie Oliver's Jamie at Home (2007))


1 lb fingerling potatoes, cooked
2 handfuls fresh green beans, steamed (I used the leftovers from last night's dinner)
3 plum tomatoes, seeded and chopped
2 tablespoons capers
3 scallions, trimmed and chopped
1 lemon, zest and juice of half
1 tablespoon white balsamic vinegar (to replace red wine vinegar in original recipe)
1/4 cup olive oil (or to taste)
1 tablespoon mustard with horseradish (to replace grated fresh horseradish)
1 cube frozen chopped dill (to replace fresh dill)

* In a bowl, mix all ingredients together. Remember to season to taste with salt and pepper.

life is a chair of bowlies

Yesterday, I went to the summer farmers' market at City Hall. I bought these beautiful cherries...I always thought these kind were sour but I was with my foodie friend Sheri who said that they were sweet and delicious and of course she was right.

Monday, July 14, 2008

Shortbread to please the little darlings


Okay so the oven was on from baking the chicken today so I decided while the oven was still hot to make some cookies for the family. This is something I get from my mother. She would often make something extra because "the oven's already hot" implying that one should not waste energy.

I've been eyeing "The Best Shortbread in the World" recipe from How to Cook by Jamie Oliver for awhile (because it looked really fast) and thought I would try it. I haven't before this because in my family the husband and offspring are not interested in baked goods unless there is chocolate (arghh). To make them more appealing, I used the old trick of sprinkling chocolate chips over the surface of the hot shortbread and spreading the melted goo into a chocolate layer on top (another tip from my mom).

Nancy's Pan Shortbread - based on the recipe from Jamie Oliver's How To Cook (2007)

1 cup soft butter (I'm not that organized so I cut one cup of regular butter into chunks and put it in the microwave on #4 power for 1 minute)
1/2 cup white sugar
2 cups white flour
3/4 cup cornstarch
2/3 cup milk chocolate chips (this amount is not for any reason other than that is all I had!)

* Oven at 300F. Put butter and sugar in the electric mixer and cream together for 5 minutes. Add flour and cornstarch one cup at a time and mix only until combined. Press into a buttered 8" square pan. Make deep indents all over with a fork. Bake for one hour. While hot sprinkle chips over top and wait a few minutes. Then use an offset spatula to spread the melted chocolate over the top. Let cool and cut into squares.

Fast Chicken Tikka Masala


Okay so yesterday morning, my husband took out what he said was a roasting chicken from the freezer to defrost. Well it was actually 8 pieces of kosher chicken packed together (kosher chicken is very flavourful chicken and you can buy it already cut up and vacuum packed). So I decided instead of roasting it to bake it in a sauce.

My kids are not fond of really spicy food (although they have become more tolerant over the years) so I mixed a jar of Patak's Tikka Masala with a large can of crushed tomatoes. After an hour in the oven, it's done, with leftovers for another day. I served this with whole wheat spaghetti and steamed fresh green beans. Okay sort of an Indian/Italian-style dinner.

Nancy's Chicken Tikka Masala (fast version)
1 tablespoon olive oil
1 kosher chicken, cut up into 8 pieces and skinned removed
1 jar Patak's Original Tikka Masala (medium)
1 (796 ml) crushed tomatoes (I used Unico)

*Preheat the oven to 350F. Brown the chicken pieces on both sides. Place the chicken pieces in a roasting pan so there is one layer. Pour the sauces on top and mix it up a bit. Place a piece of foil loosely on top and bake for 30 minutes. Remove foil and bake an additional 30 minutes.

Bulgogi beef recipe (Korean marinated beef)

I recently resurrected an old recipe for grilled beef and it was so good that my younger son declared "make this kind of meat again!" (and less than a year ago, he was a vegetarian...). So I did. I served it again two days later when my parents came over for dinner and they really liked it too. I told Sheri about it and she asked for the recipe, so here is my version of an old Eating Well recipe, followed by the original recipe:

Nancy's Bulgogi Beef

1 organic flank steak, cut deeply in a crisscross pattern (this increases the surface area for marinating)
2 cloves garlic, crushed
4 tablespoons organic tamari sauce (wheat-free soy sauce)
2 tablespoons rice vinegar
2 tablespoons sunflower oil
2 tablespoons brown sugar
a few grindings of black pepper

*Put all the ingredients in a large ziplock bag. Add the steak, seal the bag and mix it up. Put it in the fridge overnight. Grill on the BBQ or a stovetop grill pan (that's what I do), about 5-6 minutes a side. Let sit for 5 minutes and then cut into strips and serve.


Marinated Grilled (Bulgogi) Beef - Eating Well (May/June 1993)

1 1/2 lbs. boneless sirloin steak, trimmed of fat, and scored deeply in a 1 inch crisscross pattern
6 scallions, trimmed and thinly sliced
4 cloves of garlic, finely chopped
3 tablespoons finely chopped peeled gingerroot
3 tablespoons reduced-sodium soy sauce
1 tablespoon rice or cider vinegar
2 teaspoons ground toasted sesame seeds
1 1/2 teaspoons vegetable oil
1 1/2 teaspoons sugar
generous grinding of black pepper

Friday, July 11, 2008

It started at the grocery store...

Well yesterday, my friend Sheri and I had lunch together in her neighbourhood and we decided to go to Loblaws. Now this might not seem to be a barrel o' laughs but for us it's great fun. We were going up and down the isles making insightful comments on various products (especially Sheri as she is known for her vast food product knowledge and her rapier-like wit). I mentioned that she should "sell her services" because she knows so much about food and she suggested that I not say that so loud. Of course I meant her food product knowledge, but I could see that perhaps the general public might not see it that way.

In any case it got me thinking that we should make our pithy comments on food, recipes, food magazines, food on TV and restaurant food on a blog to share our wise words. We try out a lot of recipes, food products and kitchen gadgets independently and share our "research" with each other. Why not share this goldmine of culinary intelligence with the world?

In my family, if a new recipe is good, my mom will declare, "it's a keeper!" However, that was already a name for an existing blog, so I had to go for the name "that's a keeper!"

Let's see how Sheri feels about this...